

Cyberpunk 2077 Custom Build

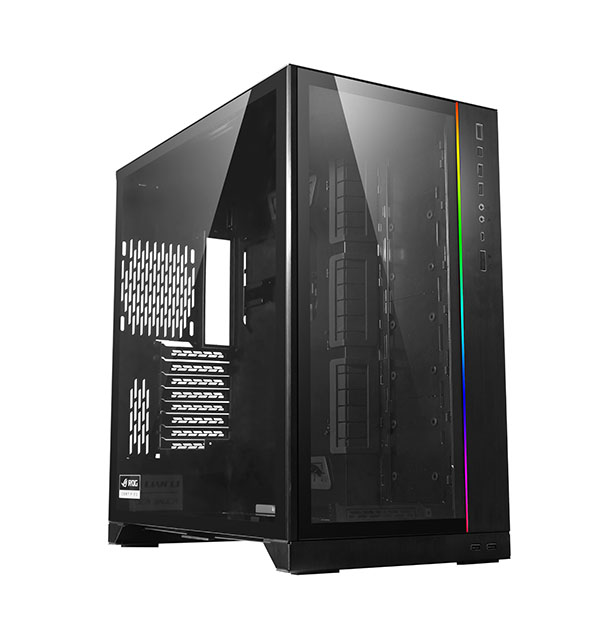
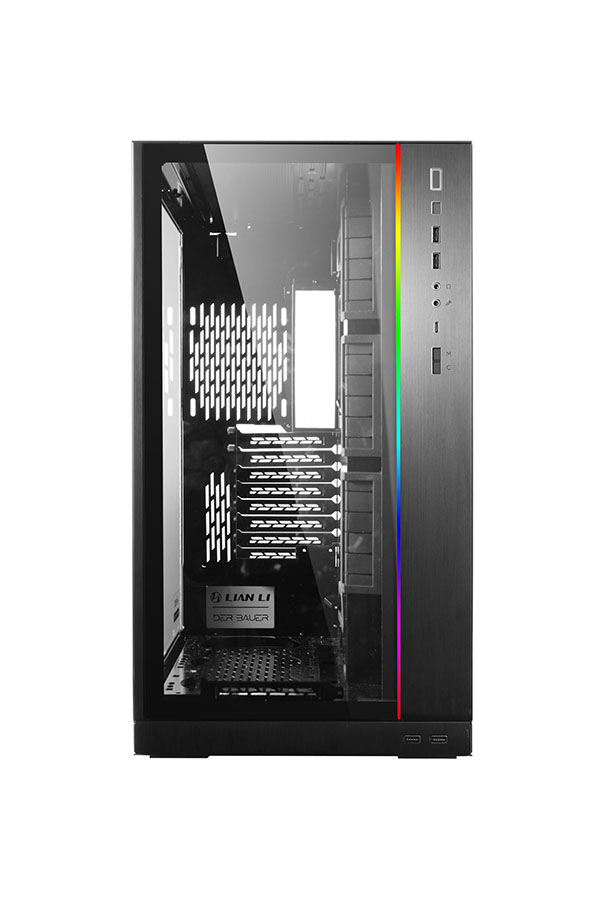
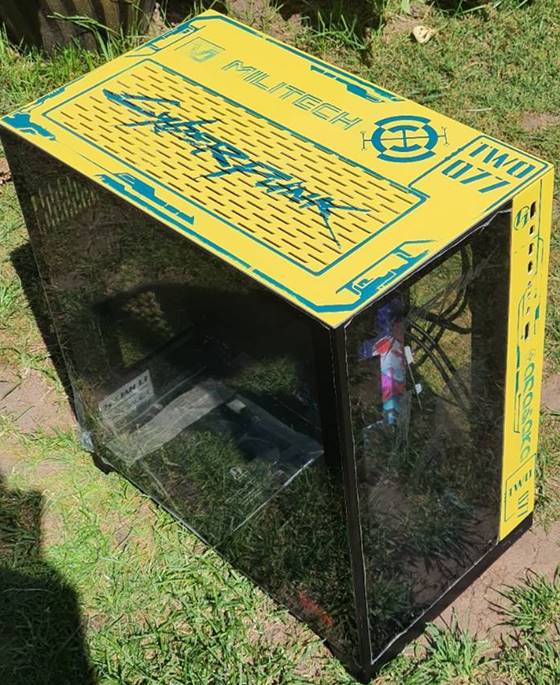
The Case
Hi all, welcome to the post about my cyberpunk 2077 themed pc build called cyberpunk two 077.
First off, the title might be confusing to some, but it hints at what I was trying to create here with this build, I wanted to show that not only could we build a themed rig but add a trick up its sleeve to enable two player gaming.
But first let’s talk about the process of the build.
This all started in my head when I saw the announcement of cyberpunk 2077, being a fan of everything dystopian I thought I have to do a mod on this, not only that It had to look dystopian so I had to not only give that edge but also give the mod a worn look too.
This was stripped down and the top panel, back, front io and front glass section were removed.
I first began by sanding back the front io and roof panel to get them ready for painting, this was done using 800 grit sandpaper to give the etching primer something to grip into, so the first thing to do was lay down just the yellow paint.
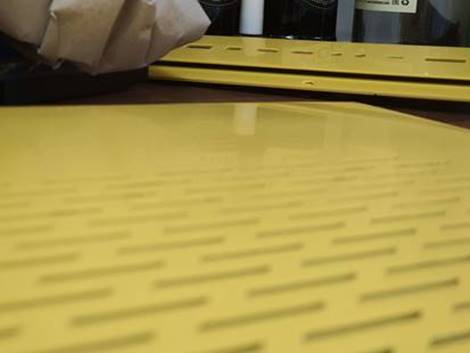
After this was done it was a case of colour sanding it back to flat as I hate seeing orange peel in a paint job, this was no easy task and requires a lot of elbow grease. Once I had completed that I took on the process of laying down my airbrush art, this involved using a mixture of a pearlescent blue and green from createx colours.
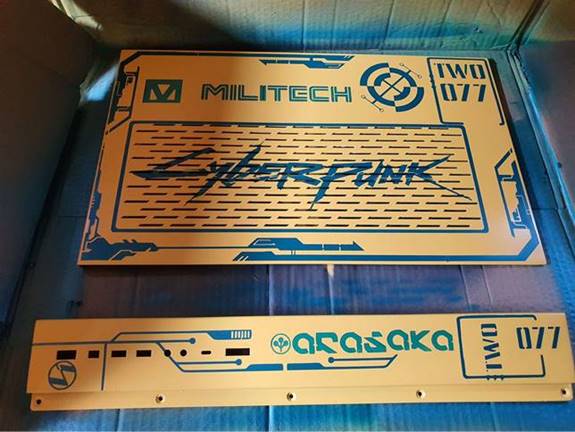
Now here comes the hard part, after doing this I moved onto the sanding down of the panel to get the worn effect in, this wad done with 1000 grit so I could take just the right amount off to get that worn look.
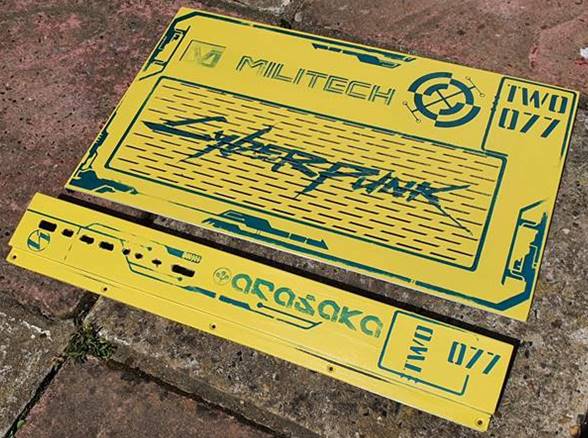
I think it came out really, nice, Ill have to add some close ups of the paint effect in the sun as it is really hard to capture this under studio lighting once done.
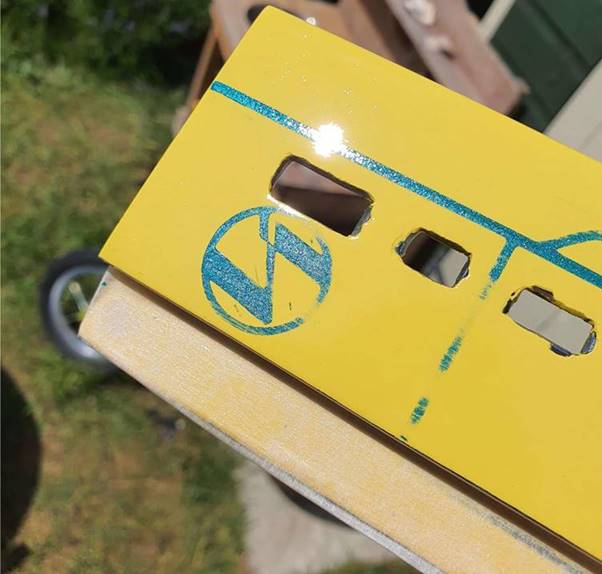
You can also see by this picture that I filled down the edges around the front io buttons and port surrounds, this was to tie in with the worn look as I wanted it to look like a case been really used in a way a dystopian device would be, with prolonged life cycles meaning years of using it and damaging the port surrounds.
Of course, now I had done all this, it was case of the real hard work, layers of lacquer and plenty of elbow grease to get the desired effect I wanted.
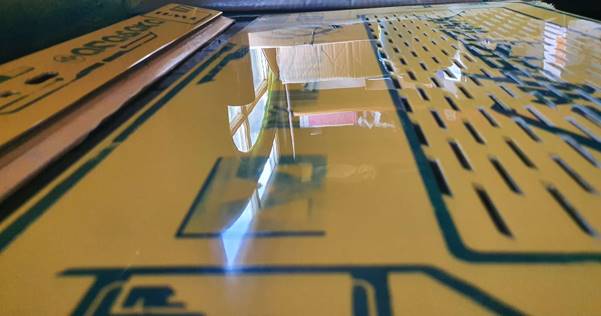
Lacquer done and sanding and smoothing done, so now I could move onto the back panel that will be hiding the wiring for the project.
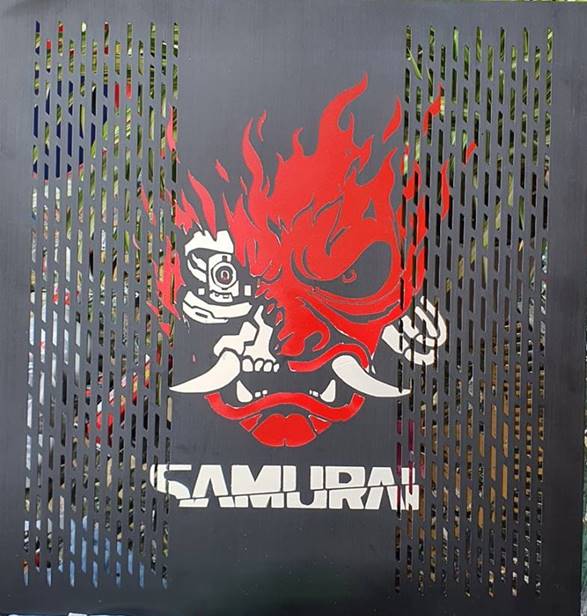
This was a simple case of laying the samurai logo down in pearl silver, pearl white and then pearl red and then sanding back, I was really pleased with how this came out and decided not to even add lacquer to this as I was happy with it as is.
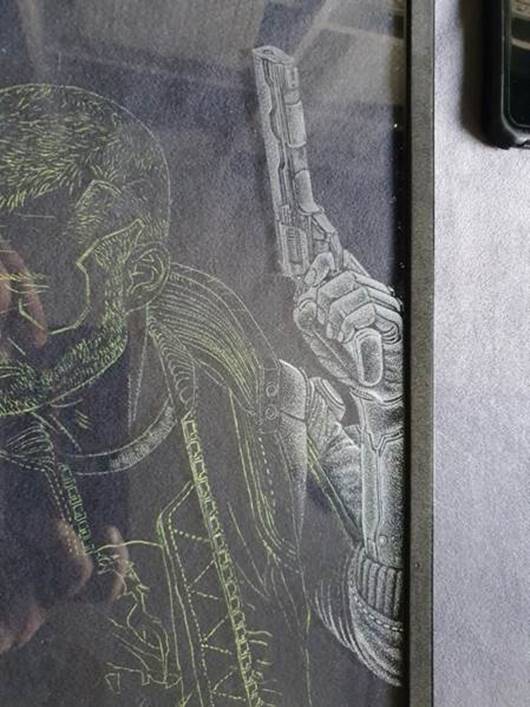
Onto the hand engraving on front panel
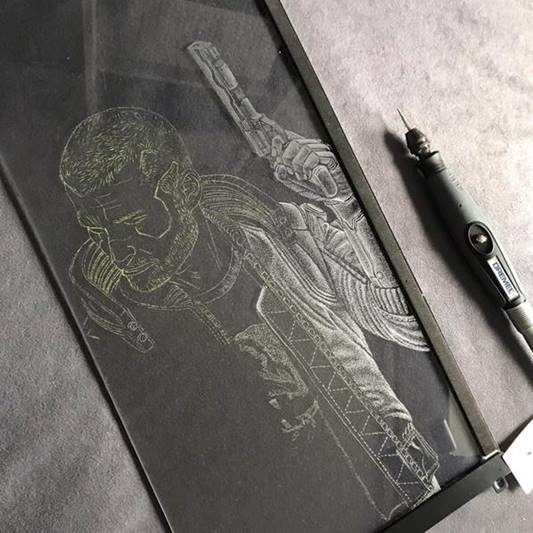
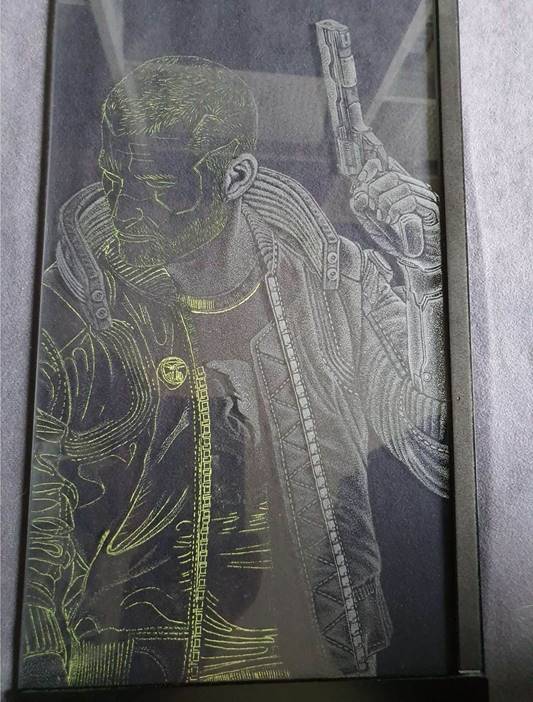
Hand engraving with a Dremel is no easy feat, there are plenty of references to this on the web, but how do you make it even harder, but with better depth, do the whole thing with dots, my wife is a truly inspiring artist with the Dremel and she still amazes me to this day, the image chosen for the front glass was of course the original V artwork from the game’s poster.
Yes, that is really done using 100s of little dots and its starts building up slowly, the skills are just crazy.
And just in case you don’t understand the dedication it takes to do something in this way, here is a close up for you.
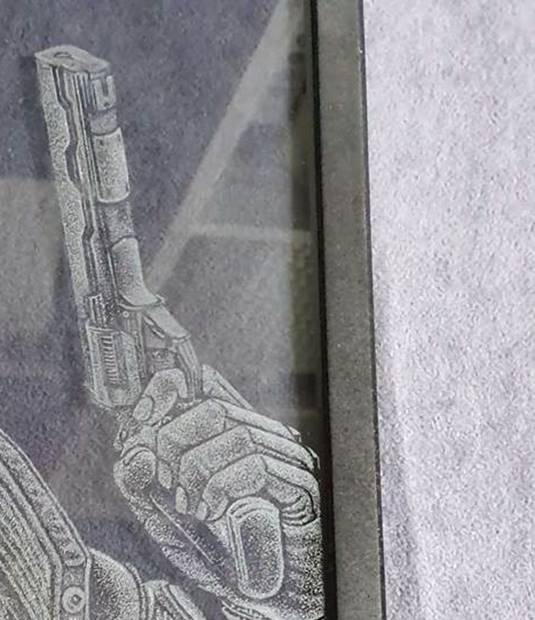
As you can see it takes 100s of dots to produce what you see from afar and its truly amazing how its done, here is how it came out in the end.
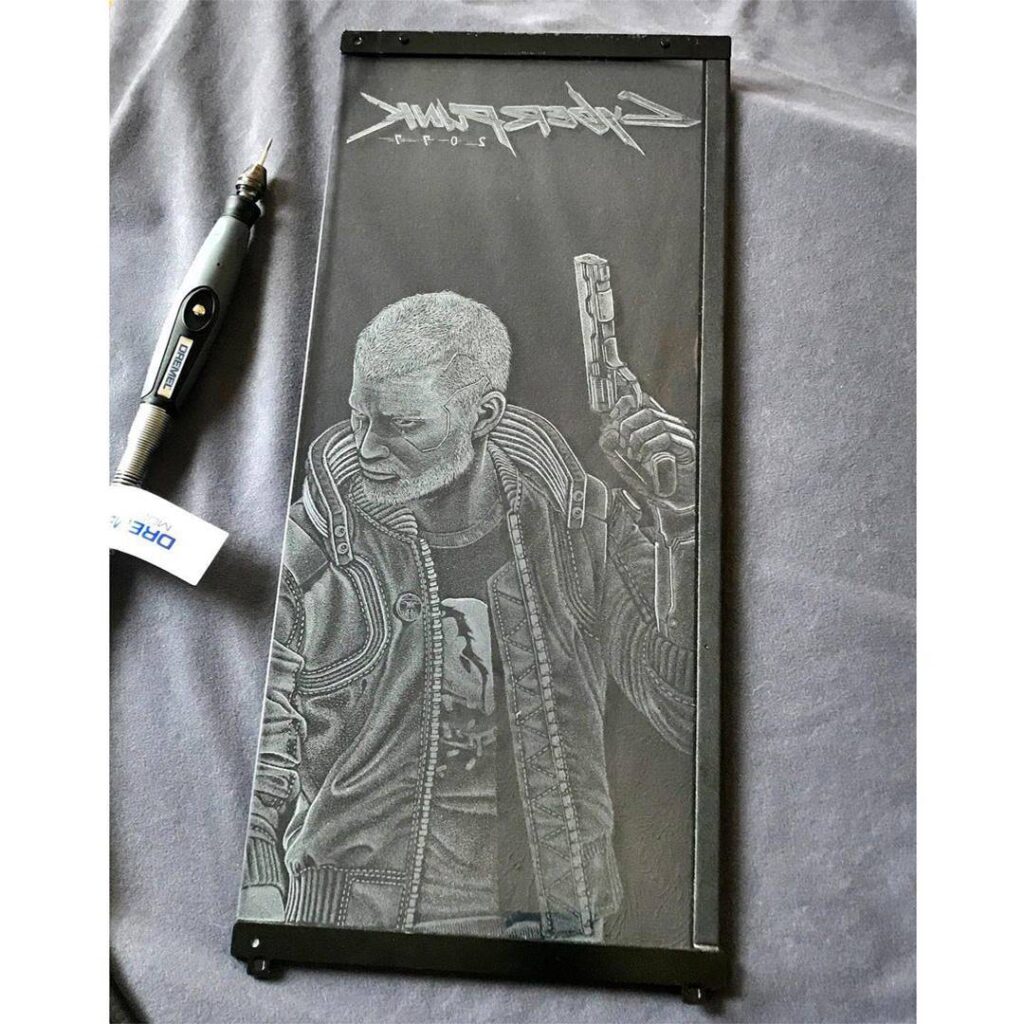
Finally with the whole case together we had a rough idea of the final look.
System components
- CPU: Intel® Xeon® W-3275 Processor – https://www.intel.co.uk/content/www/uk/en/products/processors/xeon/w-processors/w-3275.html
- Motherboard: Gigabyte C621 AORUS Xtreme – https://www.gigabyte.com/uk/Motherboard/C621-AORUS-XTREME-rev-10#kf
- GPU 1: GeForce RTX™ 2080 Ti GAMING OC 11G – system side 1 – https://www.gigabyte.com/Graphics-Card/GV-N208TGAMING-OC-11GC#kf
- GPU 2: GeForce RTX™ 2080 Ti GAMING OC 11G – system side 2 ll ll GPU 3: Gigabyte GTX 1650 SUPER™ WINDFORCE OC 4G –
- Server GPU: to run the virtual machines – https://www.gigabyte.com/uk/Graphics-Card/GV-N165SWF2OC-4GD
- Memory: 48GB of GSKILL Trident Z Royal 3200 – https://www.gskill.com/products/1/165/299/Trident-Z-Royal
- System Storage 1: 2x KIOXIA EXCERIA PLUS NVMe™ SSD 2TB – one for each virtual machine – https://personal.kioxia.com/en-emea/ssd/exceria-plus-nvme-ssd.html
- System Storage 2: 1x KIOXIA EXCERIA SATA SSD 960gb – For Media – https://personal.kioxia.com/en-emea/ssd/exceria-sata-ssd.html
- System Storage 3: 1x KIOXIA EXCERIA SATA SSD 240gb – For server – https://personal.kioxia.com/en-emea/ssd/exceria-sata-ssd.html
- Case: Custom Modded Airbrushed and given worn look Lian Li Dynamic PC011 XL – https://lian-li.com/product/pc-o11d-rog/
- PSU: 2x Seasonic Prime platinum modular 1000w – https://seasonic.com/prime-px
- Cooling: Full custom Bitspower loop Featuring acrylic hardline – https://bitspower.com/
- Fans: Lian li Uni Daisy chain fans 120mm x 9 – https://lian-li.com/product/uni-fan-sl/
- Motherboard Cables 24pin: 2x 24 pin extension: Lian Li Strimer plus extensions – https://lian-li.com/product/strimer-2-24pin/
- GPU Cables: 4x 8 pin ToTheWire mods custom cables – https://www.facebook.com/T0TheWire/
- CPU Cables: 4x 8 pin TotheWire Mods custom cables
- Case Lighting: Combo of Gigabyte RGB fusion and Razer Synapse Fluid was provided by mayhems and a mix of xt and dye – https://mayhems.co.uk/
System External components
- External Lighting: controlled by Philips hue Each virtual machine was setup using
- 2x Philips hue hub – for connecting it all up – https://www.philips-hue.com/en-gb/p/hue-hue-bridge/8718696516850
- 2x Philips hue Play HDMI Sync Box – This controls the effect of the hue lights reacting to the screen – https://www.philips-hue.com/en-gb/p/hue-play-hdmi-sync-box/8718699704803
- 2x Philips hue Lightstrip Plus Placed on rear end of each desk – https://www.philips-hue.com/en-gb/products/all-products#filters=LIGHTSTRIPS_SU
- 2x Philips hue Play light bar double pack – for behind monitora – https://www.philips-hue.com/en-gb/p/hue-white-and-colour-ambiance-play-light-bar-double-pack/7820230P7
- 2x Philips hue Play light bar extension pack – to add to above for top rear of monitora – https://www.philips-hue.com/en-gb/p/hue-white-and-colour-ambiance-play-light-bar-extension-pack/7820330P7
- 4x Philips hue Iris table lamp setup behind the seats to give that full immersive feel. – https://www.philips-hue.com/en-gb/p/hue-white-and-colour-ambiance-iris-table-lamp/8719514264489
This Is repeated on both sides and has got me addicted to the hue range, its amazing what is possible and as you can see from the video the effect is truly amazing, the hub allows you to set the positions of the lights, be it tv height, floor height or ceiling height and the location in the room. This adds to making the control and reactions of them even better.
- External Storage: Qnap TS-453BT3 4 bay 10gbe and thunderbolt 3 NAS – https://www.qnap.com/en-uk/product/ts-453bt3
- Hard Drives: 4x 16 TB Seagate Iron Wolf Hard Drives – https://www.seagate.com/gb/en/internal-hard-drives/hdd/ironwolf/
- Keyboards: Mountain.gg Everest Plus keyboard – one of the best keyboards you can buy at the moment with so many functions and customisations love this. – https://mountain.gg/
- Mice: Roccat Kain 200 Aimo – https://en.roccat.org/Mice/Kain-200-AIMO – these were stripped down to clear, and custom logos for lighted area created based on in game corpos, then coated in metallic silver, airbrushed graphics and rubbed down to give worn look, then covered with 2 coats of candy yellow and lacquered. After lacquer was hardened, I rubbed down areas where fingers would rest to give that heavy used look in that area.
- Headset 1: EPOS GP670 Wireless headset from the guys over at EPOS I SENNHEISER – https://www.eposaudio.com/en/gb/gaming/products/gsp-670-low-latency-connection-bluetooth-gaming-headset-1000233
- Headset 2 EPOS GP370 Wireless Headset – https://www.eposaudio.com/en/gb/gaming/products/gsp-370-low-latency-connection-gaming-headset-1000231 – both of these were custom airbrushed and given that worn look to match the game.
- Mouse Mats: Razer Customs: Razer Gigantus V2 XXL – https://www.razer.com/gb-en/customs/personalize/view/cyberpunk-2077/all/mouse-mats/razer-gigantus-v2-xxl
- Chair 1: Secretlab TITAN 2020 Cyberpunk edition – https://secretlab.co/?rfsn=4689567.28ad71&utm_source=refersion&utm_medium=affiliate&utm_campaign=4689567.28ad71
- Chair 2: Secretlab OMEGA 2020 Cyberpunk edition – https://secretlab.co/?rfsn=4689567.28ad71&utm_source=refersion&utm_medium=affiliate&utm_campaign=4689567.28ad71